Awhile
back I mentioned that I would soon be tackling my first set of handmade curtains for Henry's room. His room has been one of the first spaces in our new house that I have tried to complete, because it doubles as our guest room. I did quite a bit of research to try and determine which curtains would be best for his window, and decided that full length was the way to go. This also meant at least 5 yards of fabric! Way to pricey for a one year old's window treatment!! So I ended up taking the easy route, but am super happy that I did! The project cost a total of $35.00 and was completed during one afternoon nap!

Now that we are living so far away from home, we have had quite a few guests come to stay for extended visits. Henry's room is quite large and was able to accommodate a futon and all of his furniture with room to spare. When we have company we simply bring Henry into our room and leave his room for our friends. This works out really well because many of them also have little ones who can sleep in Henry's crib.
Here is one side of the room. super white and super plain. I was hoping that some full length curtains would help break up all of the starkness.
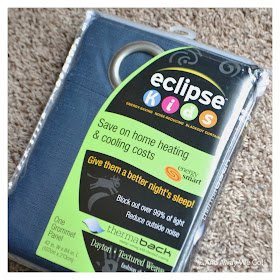
The ceilings in our new home are quite high, so standard 84" panels were not going to do the trick. However, this gave me the opportunity to tweak some inexpensive panels to get a more custom look. I started with plain grommet panels that I found at Walmart for $12.95. I was happy to find that these also had a liner that helped to keep out sunlight and noises from the street.
I folded the panel in half, measured 18" down from the top, drew a line and cut along the line.
Then, I cut fabric to match the width of the curtain panel. I chose to add 24" of fabric to my curtains. This would give me enough length to hang the curtains about 12" above the top of the window and still have them reach the floor. You may need to alter this measurement based on the window you are covering.
Once the fabric was cut, I laid the top portion of the cut panel on top of it, right sides together. I pinned and then sewed along the edge. I repeated this step for the bottom portion of the curtain panel.
Once I had the top and bottom portion of the panel attached, I folded the raw edge over, pinned, sewed and trimmed to create a tidy finished edge.
And that was that! They were ready to hang!
I am quite happy with the results! I know I could have been a bit more brave and attempted some "real deal handmade curtains", but this was quick and inexpensive and that is perfect for me right now!
They help break up the white a bit and keep some of the bright light out, which makes the whole room feel warmer. Now to find something to hang on the walls!
Linking Up


