Showing posts with label baby. Show all posts

Wednesday, January 21, 2015

Our Girl Gracie...

It has been quite sometime since I updated this little blog on the happenings of the Leeper family. My last post featured our two little monkeys in their Halloween Ninja Costumes and ended with the question of whether we would have a third little pink ninja before the big night. As it went, our little girl didn't arrive before Halloween but waited patiently until her scheduled date of November 3rd.

Cecelia "Grace" Leeper
Nov. 3rd 2014 - 7lbs 6oz

Gracie was instantly loved by her brothers (a little too aggressively by Henry) and has taken to the role of little sister very well. She tolerates being held by both of them and recovers well from their less than gentle affections.  


Andrew is already one of her favourite people. She has an endless supply of grins and giggles for him and he is absolutely smitten with her.


The last two months have been a bit of a whirlwind and when people asked me how we were adjusting to having a third child I would respond with comments like, "it's going really well" and "so far, so good"! It all seemed a bit too easy... until we left the comfort of our home and made the trek to Canada for the Holidays. Having three kids, and traveling with three kids are two very different situations!! But we all made it back alive and have settled nicely into the New Year with our new girl, and our new normal!

(typical Henry!)

Gracie is perfect. She eats well, she sleeps well and her personality seems to fall somewhere on the spectrum between her all too serious oldest brother and her all too silly older brother. I feel so blessed to be the one to watch what kind of little girl she becomes!

Photo credit: http://www.monicaridgely.com

Thursday, October 9, 2014

A Bassinet Cover Tutorial

I am happy to say that I finally got around to completing a little project that I have been planning for quite some time... a Bassinet Cover for the baby's bassinet. Baby Girl will be using the bassinet that goes along with our Uppa Baby stroller for her main sleeping quarters for the first few months and I just wasn't thrilled with the way the bright shiny red fabric looked with the coral and grey colour scheme I was putting together for her little corner of our master bedroom.


I wasn't exactly sure how I was going to make this bassinet cover. I knew that I wanted to use two fabrics and that I would need to fit them over top of the existing bassinet canopy. I didn't really measure as I went, but sort of just went with it... I hope this is still a helpful guide if you're interested in creating something similar!


I started by removing the fabric from the bassinet. It basically consists of two fabric panels, and two fabric strips that attach the panels to the frame. I traced both the front and the back panel, leaving a small flap of fabric on the front panel that would tuck under the space that opens for a handle.  Once I had cut the two panels, I pinned them (right sides together) and sewed along the middle. You can see in the picture below that the two panels fit nicely over the original bassinet hood. 


Next, I folded and ironed the section of fabric that would tuck under the handle. To make the bands of fabric that would attach the cover to the upright frame, I cut two strips of fabric, 20 cm wide and about 10 cm longer than necessary. I finished one end of each strip with a seam, pinned and sewed them along the front panel on either side of the handle flap. 


I cut a third strip of fabric that would wrap along the bottom edge of the back panel. I finished one end of this strip with a seam, lined it up with the front panel fabric strip and pinned it in place. It was necessary to do this while the bassinet cover was on the bassinet. I secured this back fabric strip by sewing along the entire length of the strip. Once the front and back fabric strips were in place I finished their outer edges with a simple seam. With the bassinet cover in place, I neatly pinned, tucked and sewed the two fabric strips so that they would look tidy once wrapped under the upright frame. 


With all seams and edges tidied up, I used some adhesive velcro circles to attach the front fabric strip to the underside of the bassinet hood. This way it can easily be removed when traveling or out for a walk.


This project turned out to be pretty simple, albeit not overly easy to explain. I hope it made a bit of sense!


I am happy with the way the Bassinet Cover adds a softer appearance to the bassinet and works with the colour scheme of the "Shared Nursery". Let's hope the new addition likes this bed enough to actually do a bit of sleeping in it!

Thursday, October 2, 2014

A dresser/change table for Baby Girl!! {brimnes hack}

The count down is on! Baby Girl Leeper is due to arrive in the next 5 weeks and I have a number of little projects in the works to keep me busy during this arduous final month of pregnancy! First on the list is establishing a little space for baby to call her own. At this point the boys are in their own bedrooms, and since we plan to keep baby in our room for the first few months we thought it better to leave well enough alone and leave Henry in his crib until we were ready for Baby Girl to have her own room. So, we've shuffled our bedroom furniture and made a bit of space for a bassinet, rocking chair and dresser/change table.


We brought in the Ikea Brimnes dresser that we had been using in Henry's room, added a change pad and the Grundtal wall organizer which fits diapers. wipes and other necessities perfectly. 


To add a bit of a girly touch, I hung three framed prints (also from Ikea!). I wanted to incorporate some of the fabric I had picked up for the space and thought that adding it behind the top drawer glass would not only look cute, but hide the contents of the drawer. 


This was an extremely simple job. I cut a piece of Elmer's Foam Board to fit the inside of the drawer, cut a piece of fabric to wrap around the board and hot glued it around the perimeter of the back of the board. To secure the board in the drawer I added a tiny dab of hot glue to the top corners. 


I absolutely love this fabric and think it adds a nice touch to the dresser. I plan to add it and some coordinating fabrics to a few other areas in the room! Hope to share those projects soon!


Tuesday, July 16, 2013

Fabric Covered Storage Bins

So, it seems we have unpacked the house, for the most part. Boxes are emptied and drawers are full. However, when we packed up to travel to Baltimore, we only brought the essentials: clothes, toys, books, crafting supplies (of course). We bought new furniture but the house is definitely a bit sparse. I am really missing all of the little things that make a house a home; picture frames, pretty vases and baskets to coral and organize our stuff.

While we unpacked, I held onto a number of boxes that could be repurposed for something around the house. The first area that begged for some organizational attention was Henry's change table. He is one wiggly little bug when it come to getting dressed and it is super important that the essentials are close at hand to make quick work of the task. These Fabric Covered Storage Bins were a quick project that look great sitting on his change table.


Using a hot glue gun I attached a long strip of leftover fabric to the outside edges of a sturdy cardboard box.


I carefully tucked the edges of the fabric around the corners of the box and used card stock, cut to the appropriate size, to finish the inside. I also added a couple of blue Martha Stewart tags that can be found at Staples!


I love the way these fabric covered storage bins make mundane organization a little more pretty! I have used one to hold diapers and wipes and the other for various toiletries and a few toys to help distract Henry while having his diaper changed. 


Henry's room is still really empty, but bit by bit it will come together! 
Check back soon for my first attempt at homemade curtains!


Linking Up

Domestic Superhero
A Bowl Full of Lemons

Friday, April 26, 2013

DIY Stroller Toy Bar


baby stroller

Henry recently graduated from his bucket car seat to the kind that stays in the car, meaning that it was time to pull out the "Big Boy Stroller Seat". We have the Uppa Baby Stroller system and have absolutely loved it. It has travelled with us everywhere and been extremely versatile. However, I had forgotten about Andrew's obsession with chewing on the bar that crosses over the seat, that is until Henry started doing the same thing! The bar was looking completely gross, and after digging a bunch of little black pieces of foam from is mouth and I knew I needed a solution!


I decided to sew a cover for the bar that would work for attaching a few toys. I started by measuring two pieces of fabric that were long enough to cover the bar and wide enough to wrap around, adding an inch to the width for a seam allowance. I placed the two pieces right side together and sewed around the perimeter, leaving a small opening to turn it right side out. To close the opening, I tucked the raw edge in and added a finishing stitch to the end. I did this on the other end as well, just for the sake of symmetry.


Then, I folded the cover in half and pinned the edges together. To add the ribbon loops for attaching toys, I cut three pieces of ribbon, folded them in half and tucked the looped end inside of the folded cover. I pinned these in place and sewed along the length of the cover, making one long tube. 


I then turned the whole cover right side out and was done! This tube fit snugly over the stroller seat bar and completely covered the mess from Andrew's teeth!

baby stroller

baby stroller

They toys attached easily and now he won't be able to toss them from the stroller! I think this idea would work for quite a few strollers. It took about twenty minutes to sew and was made from scraps material... gotta love a free project!

baby stroller


Wednesday, April 17, 2013

My Favourite Baby Items...

Yesterday I did a little happy dance when my doorbell rang in the middle of the afternoon. I had been tracking a delivery since late last week, and I knew that my new diaper bag had finally arrived! The boys watched, in confusion, as their Mother giddily tore the box open and proceeded to excitedly explore all of the glorious pouches and compartments. I spent at least a half hour packing and repacking my new bag with all of my everyday items... it was the highlight of my day!

Anyway, the excitement of the new diaper bag got me me thinking about some of my other favourite baby items and I thought I would round up some pictures and links and share them with you!

First and foremost, you probably want to see the bag that had me so pumped up... Look at all of those compartments! One of the side pouches is even insulated to keep food/bottles chilled. I love that the main portion of the bag zipps shut, but that the four outer pockets remain open for quick access to keys, phones or toys.

Lassig Diaper Bag

One of my favourite items in my diaper bag, is the JJ Cole Diaper Pod. It holds wipes, a few diapers, diaper cream, and comes with a change pad. It is perfect to quickly grab from your bag, when you need to change your little one in a public washroom (there never is enough space on those change tables!)

diaper tote

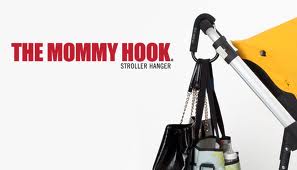
Another must have for us is the "Mommy Hook". Who would have thought that an oversized carabiner would be so popular amongst parents? We keep this attached to our stroller at all times. It's great for carrying shopping bags, your purse, the diaper pod (for quick access to wipes) and even soggy bathing suits at the beach!


The Halo Sleepsack is another item that we would not be able to get by without. Experts recommend that infants should not be put to bed with loose blankets. We originally thought this was a little paranoid, but after a scary, blanket wrapped around head, incident with Andrew, we are strong advocates for this policy.


The Mally Bib was an impulse by that really paid off! I fell in love with their fun designs, and picked one out for Andrew about three years ago. I felt a little guilty about spending $40 on a bib, but am I ever glad that I did! This bib has been used every single day, at every single meal, for three years straight. It fit Andrew throughout his toddler years, and has now been passed onto Henry. It wipes up easily, and never has to be machine washed... Love it!

Leather bib
Lastly, the Kushies Nursing Canopy has been an everyday favourite. They are very inexpensive ($8 each) compared to some of the other options, and they fold up nice and compact. What I really love is that they are made from the same fabric as the Kushies receiving blankets, so they are excellent for burping when baby is done!

nursing canopy
I know some, if not all, of these items are completely superfluous to caring for a baby... but they have made my life a little easier and they make some dirty jobs a little more pretty! What are your favourite  "must have" baby or kid items?


Thursday, April 11, 2013

Car Seat Cover Tutorial

Car Seat Canopy

Last September, I shared the car seat cover that I made for Henry, in this post. I have been pleasantly surprised at how much traffic it continues to receive. At that point, I was just becoming familiar with the tutorial aspect of blogging, so I didn't try to attempt one for a project with so many steps. However, I am much more comfortable with these posts now… so I snapped a bunch of photos while I was making a cover for my friend Shannon and her beautiful baby girl, Ayla! 

Here is the step-by-step process...


Carseat cover tutorial

To make the front panel of the cover, fold your fabric in half and roughly sketch and then cut this shape. It should be 16.5" wide (from fold) and 22" long. You will want to ensure that these dimensions work for your car seat, as they are all a bit different. 


Carseat cover tutorial

I chose to add a strip of a coordinating fabric to the front of the cover. To do this I removed a 5" strip from the front panel and replaced it with the coordinate. I cut the yellow fabric 6" wide for a seam allowance. Once I had sewn the strip on both sides, I ironed the seams flat.


Carseat cover tutorial

I used the front panel as a guide to trace and cut the back portion of the cover. For most car seats this piece should be slightly smaller than the front piece, but again, all carseats are different.

Carseat cover tutorial

I sewed the front panel to the back panel and ironed the seam flat. Then, placing the cover right side down, I traced and cut the underside of the cover. 

Carseat cover tutorial

Keeping the fabric right side together, I sewed around the perimeter of the cover, leaving a 3" opening to turn it right side out. After turning the cover right side out, I ironed the seams, taking special care to fold the raw edge of the opening in.

Carseat cover tutorial

I then added a finishing stitch to the cover, and closed the opening, by sewing around the perimeter.


To make the straps, cut two pieces of fabric 9.5" by 11".


Fold and iron this piece of fabric length wise (you want the strap to be 9" long). Open it back up and fold each edge into the crease in the middle and iron. Then fold the ends in and sew a raw seam, so that the strap will be nicely finished at both ends. This is where I made a slight change from the first cover that I made. Instead of velcro, I wanted to use snaps. I attached these before I closed the strap, with a finishing stitch, so that the there would be no visible stitching around the snaps. 


Pin the straps to the seam on the top of the cover, and ensure that they are in an appropriate location by attaching the cover to your carseat. You will want to make sure that you can still easily carry the car seat without having to move the cover. Once you have found the correct location, sew the strap directly onto the cover with two lines of stitching (one on each side of the seam). Snap your cover to your car seat and you are ready to go!!


I was so excited to give this gift to Shannon and Ayla. The colours go well with her car seat, and even her nursery;) Ayla was really pumped to try it out... don't let her expression fool you!!


Linking Up
The Taylor House - Pinterest Power Party
In Designer Jeans - Stop, Look & Link Party