Don't forget to check out some of Chrissy's other great posts and the incredible features from her "Pinterest Power Party"!
Showing posts with label featured. Show all posts
Thursday, March 28, 2013
Thursday, March 21, 2013
Mini Egg Blondies...
I was looking for a fun recipe for a "Girls Night In" when I stumbled upon (this pin), that I had found a few months back. The recipe was for Cake Batter Blondies that had both white chocolate chips and rainbow sprinkles... they looked fabulous! However, I wanted to make a few changes to "Easter them up" a little so made a few adaptations...
Here is the recipe, you can throw the batter together in about two minutes, but they do take about forty minutes to bake.
Ingredients:
1 box of Rainbow Bit cake mix (I used Betty Crocker)
1/4 C canola oil
1/4 C table cream
1/4 C milk
1 egg
1 tsp vanilla
1 200g package Cadbury Mini Eggs
Combine cake mix, oil, cream, milk, egg and vanilla in a large bowl and stir until the mixture is smooth. In a separate bowl smash Mini Eggs (I used a mortar and pestle). Stir half of the smashed Mini Eggs into the batter. Pour batter into a greased 8x8 cake dish/pan. Sprinkle the remaining smashed Mini Eggs over the batter and bake for approximately 40 min. The blondies are finished when the edges are golden and crispy and the middle is still quite soft (they will harden as they set). Allow blondies to cool for 20 minutes before slicing and removing from the pan.
I think I'll make some more for Easter brunch!
Thursday, March 14, 2013
Jessica's DIY Sign
I'm happy to say that Jessica from, Prairie Girl to Southern Belle, is hear today to share a great DIY project with us!
I've had a sign on top of the kitchen cabinets for years now. It was time for a change. If I had a Silhouette, I would have pulled it out and whipped out some vinyl, to do this project quickly. But you know what? It wouldn't have turned out quite the same. Don't get me wrong! A Silhouette is still on the top of my wish list!
Last week, when I was painting and touching up some furniture, I also painted that brown sign my favorite creamy white, December Starlight. I laid the sign down on two small paint cans so I could paint it easily on the sides.
When the kiddos went to bed, I played around with some fonts on the computer and printed out my saying. I laid it out to get the placement right. And if you're wondering, yes, that P does look like it's too far away. I didn't notice it until the project was done...I blame it on the DayQuil.
To get the letters traced on the wood there are probably a number of ways you could do this. Here's how I did it. I traced the letters on the back side of the papers (put a piece of paper underneath or the ink will be on your table), flipped them over and set them right side up on the sign. Then I traced them on the right side. The pencil on the reverse side of the paper will transfer to the wood. In the photo below, I had already gone back and traced the letters with my Sharpie.
Then start filling them in. I didn't worry about it being perfect because I wanted to distress it later
Now the fun part. I just took my good ol' sanding block and sanded away. The result is exactly what I had in mind. Kind of rough and faded looking. Love it! And it was free! It doesn't get better than that!
Here it is hanging above the kitchen windows in our 'breakfast nook'. I had a picture of the whole area but it's so cloudy and it just didn't quite turn out.
This project was so easy and fun that I can already see a few more of these in my future!
Thanks so much Jessica! The sign is fabulous! Don't forget to check out more of Jessica's great DIY projects on her blog, Prairie Girl to Southern Belle!
![]() |
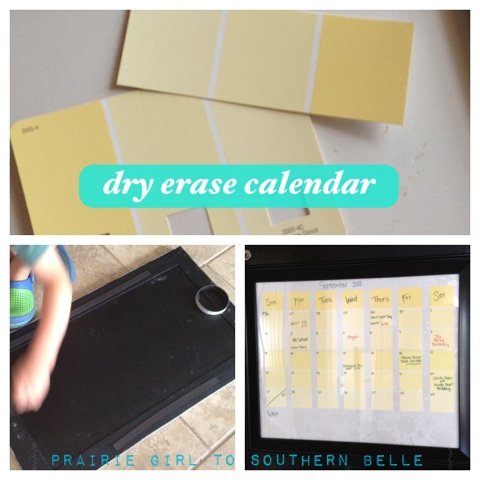
| Dry Erase Calendar |
Here are a couple of my favourites!
|
| DIY Goo Gone |
Tuesday, March 12, 2013
An Easy Easter Garland!
Hello everyone! Today I am over at The Taylor House sharing a super simple Easter Garland that your kids can make from supplies you have at home! Click on the link below to check it out!
"The Taylor House" is a great blog with lots of wonderful recipes, crafts and DIY projects! I'm excited to say that Chrissy has asked me to join her team as the regular contributor for kids crafts... right up my alley!!
Wednesday, March 6, 2013
iheart Jen Jones!!
It is very easy for me to look back and pinpoint exactly where my little "blog addiction" began. After getting hooked on Pinterest last spring, I stumbled upon Jen Jones and her absolutely amazing blog, IHeart Organizing. This blog is chalked full of amazing DIY projects that focus on organizing and simplifying life. Today, my blogging dreams came true when she featured my post on "Simple Drawer Organization" along with some other great projects! Hop on over to check it out!
A big thank you to Jen for choosing this little blog to share with her readers!
Friday, March 1, 2013
Simple Drawer Organization...
**Hello! If you are here visiting from IHeart Organizing, Welcome!! I am so glad that you took a moment to check out my blog! I hope you enjoy this post and take a minute to look around!**
My computer desk has two tiny little drawers that have always been used as a bit of a "catch all". Pens, paper clips, cords, screwdrivers, stamps, passports... it all gets tossed in these two spaces. The lack of organization means that things were getting crumpled, jammed and forgotten/lost on a regular basis.
I had been meaning to tackle these drawers for a long time and finally got down to business a few weeks ago (I was inspired by a shiny new set of sharpies!).
I kept it very simple, using craft paper to line the drawers and then folding and hot gluing the same paper down to make dividers. I also cut a document tube (paper towel roll would work just as well) and covered it with craft paper to make little cubbies for all of the cords I use on a regular basis. Of course, a little washi tape added that extra little touch!
This little project was quick (just one nap!), simple and cheap. I love that all of the space in the drawer is utilized. Also, since the paper was not attached to the drawer it can be changed and updated when needed. Perfect!
Linking Up At:
Subscribe to:
Posts (Atom)