Showing posts with label Organizing. Show all posts

Wednesday, March 5, 2014

A party planning journal...

Today, I wanted to share a simple party planning idea that I use whenever I am getting organized for a party. I have been using a Party Planning Journal for years, for parties big and small!

party planning journal

The idea is simple (and probably used by many), grab a notebook and give it the job of housing all of your lists when getting organized for entertaining. For dinner parties I usually just jot down the menu, but for birthday parties I include the guest list, games and decoration ideas.

party planning journal

What I find most useful about having this information all in one place is that I can look back to see what  I served at previous parties. That way I can make sure I'm not always serving the same food to our guests! It's also helpful when brainstorming a menu to see whats worked well in the past.

party planning journal

I recently filled my original party planning journal and had to start a new one. I chose this pretty Martha Stewart journal and added a festive touch with some silhouette vinyl cut outs. It's a great size to take along to the grocery store and looks super cute sitting out on my desk!

Tuesday, January 7, 2014

Organize Your Christmas Cards...

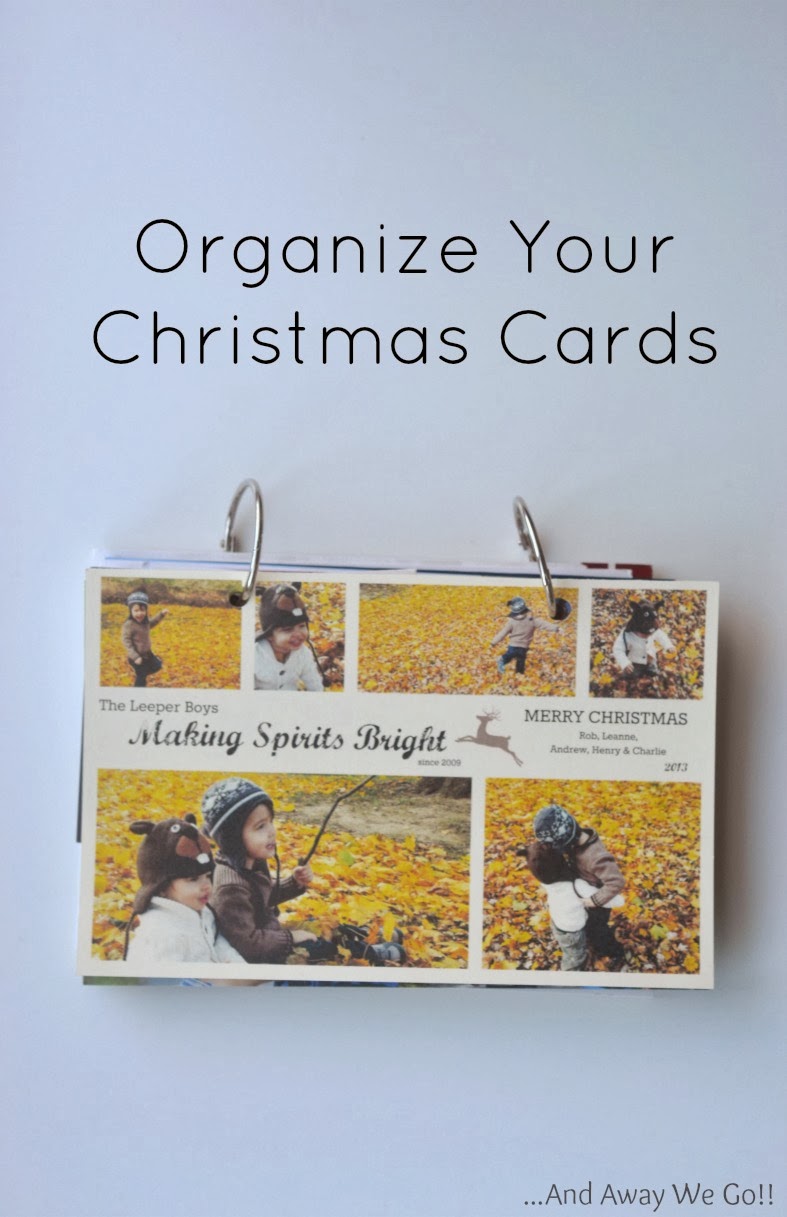
For the last couple of years, before the Christmas decorations are packed away, I have taken some time to organize all of the amazing Christmas cards sent to us throughout the holiday season into a little flip book. I was never sure what to do with all of the cards, you only need so many Christmas tags and I can't stand the thought of tossing the beautiful photos of our friends and family. These Christmas Card flip books pack away easily and are so fun to look through each year!


To make the flip book, I use a pair of ring clips and a hole punch. I use our family Christmas card first which eliminates the need for a cover because the year is easy to see. 

To make sure that the cards line up nicely I start by punching the cover and then use it as a guide for each of the following cards. I love the amazing custom photo cards that so many people make. I think we received an all time high of these this year!


These flip books  also allow you to secure any little photos that have been included as well as smaller cards. 


The boys enjoy flipping through to see all of their friends... Henry was particularly enamoured with one of his besties, sweet little Ayla! It will be fun to pull these out next year to see how much all of these kiddos have grown!!


Monday, August 5, 2013

Sewing Storage...

Last week I shared a few of the simple ideas I had found while trying to decide what to do with my new Heritage Collection Mason Jars. There are so many ways that you can use these jars and they add such a nice touch to any space. I settled on using the jars to organize my sewing supplies. Not very creative, but extremely functional!

Mason Jars

No fun tutorial to share, I simply organized my buttons, bobbins and thread into the jars and then popped a label onto each lid.

Mason Jars

mason Jars

I covered the box that the jars came in with some fabric, using the same "No Sew" method that I blogged about here. Keeping the jars inside of this box makes it easier to grab everything that I need from my cart and stops them from tipping when it gets moved around. 

mason jars


Like I said, pretty simple and very functional!

Linking Up

Wednesday, July 31, 2013

too much??

One day last week I came home to a wonderful surprise... my label maker had arrived! That night I could hardly wait to get the kids in bed to check it out (I know, pretty sad). I was amazed at all of the different font and border options and before I knew it I was printing all of them, just to compare. I decided to stick them to a sheet of card stock for future reference.


... and then I got a little carried away.


Who doesn't need a little flip book outlining all of their favourite label options? It's kind of like cleaning your soap or vacuuming your vacuum, but it makes me happy!

Tuesday, July 23, 2013

Organizing Craft Supplies ~Card Stock~

If you know me, or have been following for awhile, you know that it has always been my dream to have a space in my home to dedicated to crafting and sewing. Our new place has a great little loft that Rob and I have set up as a shared office. My half of the office (maybe spreading a little into his domain) has plenty of room for sewing and craft supplies and I am really excited to get it all set up! First up on the craft supply list... cardstock!


I found this great paper organizer at Home Goods and loved the colour right away. It was a pretty  great deal at $19.99 and goes really well with the fun wall hanging that I had already picked up!


Each paper tray has a small slot for a label that I knew they would look great with a chalkboard finish.


To make the labels, I simply cut the out a rectangle, added a Martha Stewart Chalkboard label and then trimmed the edges. 


It was easy to divide my cardstock collection into three categories (white/ivory, colour, and pattern). I wanted to make sure that the paper would sit nicely in the tray so I covered three pieces of cardboard with a patterned paper and placed each board at the front of the three trays. The cardstock is easy to access and will no longer get creased and damaged in the bin I used to keep it in. 


This little project makes me so happy! I absolutely love the way it looks! I know I'm not the only one who gets this giddy over organizing craft supplies... how do you get organized in the craft department?


Linking Up

A Bowl Full of Lemons

Tuesday, July 16, 2013

Fabric Covered Storage Bins

So, it seems we have unpacked the house, for the most part. Boxes are emptied and drawers are full. However, when we packed up to travel to Baltimore, we only brought the essentials: clothes, toys, books, crafting supplies (of course). We bought new furniture but the house is definitely a bit sparse. I am really missing all of the little things that make a house a home; picture frames, pretty vases and baskets to coral and organize our stuff.

While we unpacked, I held onto a number of boxes that could be repurposed for something around the house. The first area that begged for some organizational attention was Henry's change table. He is one wiggly little bug when it come to getting dressed and it is super important that the essentials are close at hand to make quick work of the task. These Fabric Covered Storage Bins were a quick project that look great sitting on his change table.


Using a hot glue gun I attached a long strip of leftover fabric to the outside edges of a sturdy cardboard box.


I carefully tucked the edges of the fabric around the corners of the box and used card stock, cut to the appropriate size, to finish the inside. I also added a couple of blue Martha Stewart tags that can be found at Staples!


I love the way these fabric covered storage bins make mundane organization a little more pretty! I have used one to hold diapers and wipes and the other for various toiletries and a few toys to help distract Henry while having his diaper changed. 


Henry's room is still really empty, but bit by bit it will come together! 
Check back soon for my first attempt at homemade curtains!


Linking Up

Domestic Superhero
A Bowl Full of Lemons

Tuesday, July 9, 2013

DIY Menu Planning Board


Hello! I hope everyone is having a great week. Our second week in Baltimore is resembling life in London, naps and meals have returned to normal scheduling and everyone is better off for it! We still have many boxes to unpack but the essentials are in working order which makes me feel 100% better. I just don't function without some semblance of order!

It is this need for routine that lead me to hang the first piece of decor in the new place. Quite a while ago I made a weekly menu board. Having the week's meals planned out it extremely helpful for me. It gives me an action plan at the grocery store which saves both time and money and I like that I don't get stuck at 5:00 with nothing in mind for dinner!


Our weekly menu is far from gourmet. I like to try new recipes now and then, but for the most part it's quick and easy through the week!


To make this menu board I used an old picture frame and some scrapbooking paper to lay out a template for the menu. I also created a box to jot down items "To Buy" that I don't normally have on hand. The paper is behind glass, so I can use dry erase markers to write down our meals and easily erase for the next week. 

I have been using this menu board for over a year now. I don't always update it and I don't always follow the plan. However, I do find that it's the weeks that I have taken the time to work out a menu for that go the smoothest!

Do you work from a weekly menu? Where do you record your plan?


Tuesday, April 9, 2013

Office Supply DIY


I have always loved office supplies and am quite proud of my sticky note, Sharpie and page protector collection (you'd also be impressed if you saw them)! So, it is no surprise that I am drawn to fun ideas for embellishing these everyday, mundane objects.  Here is one of my most recent "office supply improvements" and five fun ideas from the web!


Tuesday, March 26, 2013

Organizing kid's medicine...


Why is it that our children's symptoms always strike in the middle of the night? I can't count the number of times I've had to frantically search my cupboards, in the dark, looking for Tylenol to ease the pain of teething or treat a fever. Up until now, I had kept all of our kid's medicine in a small travel bag. This worked well for tossing in a suitcase, but was not ideal for quick access at home. I decided that with a growing collection of lotions and potions, it was time for an upgraded system!

I started by picking up this tackle box at Canadian Tire. I gathered all of our kid's medication into one spot and tossed anything that wasn't being used or had expired. I was happy to see that everything fit nicely into the box, including measuring spoons and droppers, with room for anything else we may need to add!
In order to save more night time frustration I printed up a fever chart and a dosage chart for Infant and Children's Tylenol as well as the Advil drops... my eyes can never focus on the small print at 3:00 am! 
I attached the 4 charts with a ring clip and tucked them into a little pocket, made from paper and tape, on the top of the storage box.

 I'm hopeful that the worst of cold and flu season is behind us, but poor Henry has some pretty 
swollen looking gums that will keep us up in the night's ahead... wish me luck!

Linking Up